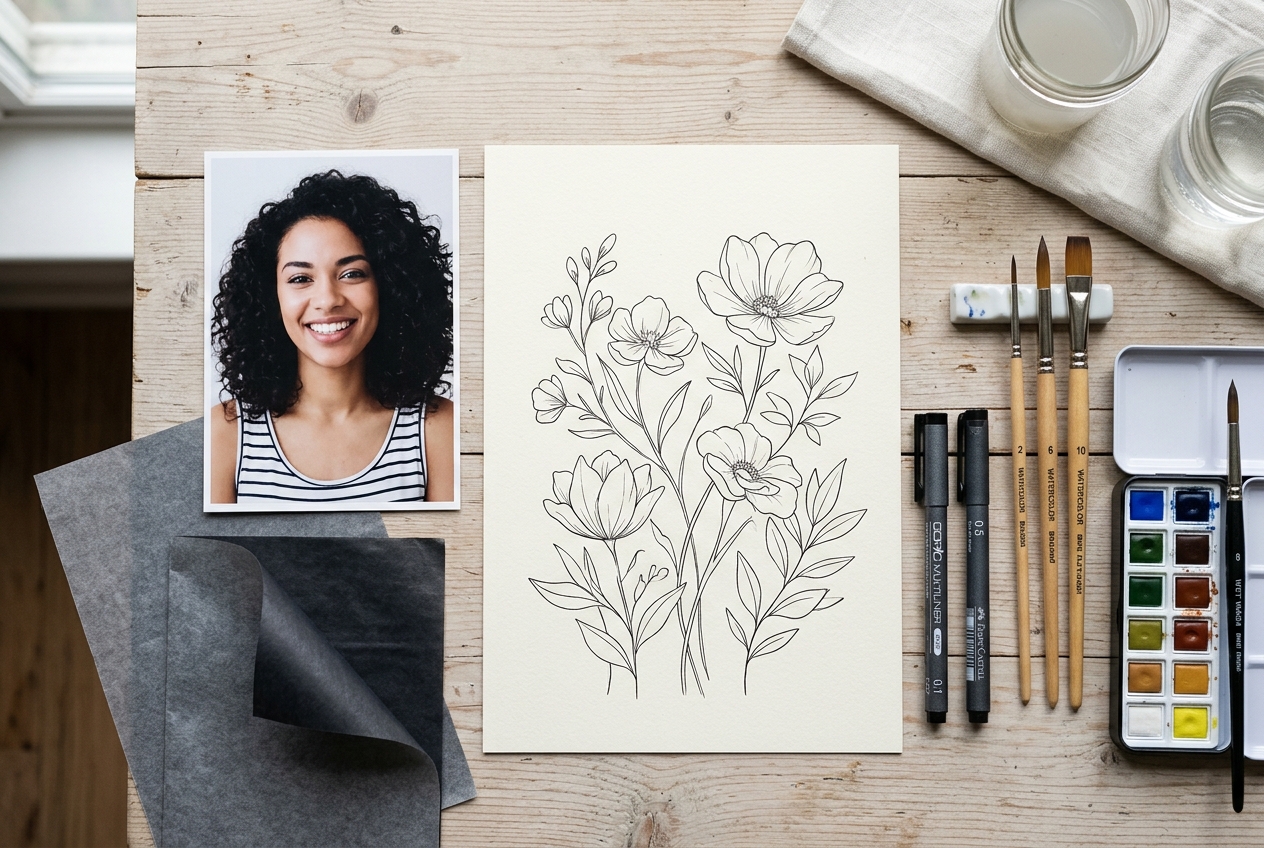
For many watercolorists, crafters, and aspiring painters, the blank white sheet of cold-press paper is the most intimidating sight in the studio. You have a gorgeous reference photo—perhaps a sunlit portrait of a loved one, a beloved pet, or an intricate botanical garden—but you hesitate because capturing accurate anatomical proportions freehand feels daunting.
Here is an open truth from professional artists: virtually every master painter in history utilized transfer aids.
From the Renaissance masters using cartoons and pouncing pins to modern illustrators using light boxes and transfer sheets, separating the drawing phase from the painting phase allows you to focus 100% on what watercolor does best: fluid washes, luminous glazes, and color harmony.
To do this, however, you first need a clean, high-contrast contour outline of your photo. In this guide, you will learn how to turn any digital photo into clean, printable line art—completely in your web browser—and how to transfer that outline onto delicate watercolor paper without tearing or denting the surface.
1. Why Photos Fail as Direct Tracing References
Have you ever printed a full-color photograph, placed it under your watercolor paper over a window or light box, and tried to trace it?
If so, you quickly encountered three frustrating obstacles:
1. Shading Ambiguity: Photos are made of soft gradients and shadows, not outlines. It is difficult to tell where a cheekbone ends and the background shadow begins.
2. Ink & Paper Opacity: High-quality 140 lb (300 gsm) watercolor paper is thick and textured. Ambient room light or window light cannot penetrate through dark photographic shadows, leaving you guessing where key contours lie.
3. Graphite Overload: When you trace over complex tonal values, you tend to press harder with your pencil, creating harsh dark grooves that permanently mark the cotton paper and bleed ugly gray streaks into wet watercolor washes.
The solution is to preprocess the photograph into a two-tone contour drawing (coloring page). By removing tonal shading and isolating only the definitive structural edges, you get an unmistakable template that shines through any light box or prints effortlessly onto transfer paper.
2. Converting Photos to Line Art in Your Browser (No Software Required)
In the past, converting a picture into an outline required installing heavy desktop software like Adobe Photoshop or Illustrator, converting layers into Gaussian blurs, running high-pass filters, and tweaking threshold curves.
Today, you can generate clean line art in seconds directly in your web browser using client-side computer vision algorithms.
How In-Browser Edge Detection Works
When you load an image into Pintado’s Free Photo to Coloring Page Converter:
1. Grayscale Desaturation: The image is converted into luminance values (Y = 0.299R + 0.587G + 0.114B), discarding confusing color temperatures.
2. Gaussian Smoothing: Subtle photographic sensor noise, film grain, and micro-textures are softened so they don’t produce speckles.
3. Sobel Edge Filter (3×3 Kernel): The algorithm scans adjacent pixels horizontally ($G_x$) and vertically ($G_y$) to calculate sudden gradients in brightness:
$$mathbf{G} = sqrt{mathbf{G}_x^2 + mathbf{G}_y^2}$$
- Adaptive Thresholding: Pixels with steep edge gradients become crisp black contour lines; flat surfaces (like skin, sky, or smooth walls) become pristine, paper-white voids.
Original Photo  ──►  Grayscale Pass  ──►  Sobel Convolution  ──►  Thresholding  ──►  Clean Coloring Sheet
[RGB Pixels]         [Luminance]          [Detect Gradients]      [Pure Black/White]    [Ready to Print]
Best of all, because the processing executes entirely inside your browser’s local RAM via the HTML5 Canvas API, your private photos are never uploaded to any remote server or stored in the cloud.
3. How to Choose and Prep the Best Photos for Line Conversion
Not every photo translates into line art with the same ease. To get crisp, publication-grade coloring pages, follow these photo selection guidelines:
| Photo Factor | Ideal Characteristic | What to Avoid |
|---|---|---|
| Lighting | Directional, high-contrast side lighting (creates distinct form shadows) | Flat flash photography, washed-out midday sunlight |
| Focus | Crisp focal point with sharp subject edges | Heavy motion blur, out-of-focus soft lenses |
| Background | Clean, uncluttered background (or softly blurred bokeh) | Highly busy patterned wallpapers or dense jungle vines |
| Subject Contrast | Clear value contrast between hair, clothes, and skin | Dark hair against a black night background |
### Pro-Tip for Dark Backgrounds
If your subject’s hair blends seamlessly into a dark jacket or midnight backdrop, quickly crop the photo tightly or adjust your phone’s shadow slider before converting. This prevents the converter from merging the subject into the surrounding space.
4. The 3 Methods for Transferring Line Art onto Watercolor Paper
Once you have generated and printed your line art template from Pintado, how do you transfer it onto your final watercolor block or cotton sheet?
Here are the three proven studio techniques, ranked from simplest to most professional:
Method A: Light Box / Tracing Table  ──► Best for thin/mid-weight paper (smooth surfaces)
Method B: Graphite Carbon Transfer   ──► Best for 300gsm cold-press / rough watercolor paper
Method C: Watercolor Pencil Pouncing ──► Best for ultra-delicate botanicals (zero pencil lines)
Method 1: The Light Box / Window Technique (Fastest)
– Best for: 90 lb to 140 lb cold-press or hot-press paper with decent translucency.
– Tools: LED drawing light pad (or bright sunny window), masking tape, 2H pencil.
– Steps:
1. Tape your printed line art sheet onto the center of your light box.
2. Tape your watercolor paper directly over the template, ensuring it is square.
3. Turn on the light pad in a dimly lit room. The black contour lines will shine through clearly.
4. Using a hard 2H or 3H graphite pencil, trace the essential landmarks with a feather-light touch.
Method 2: Graphite Transfer Paper (The Studio Standard)
– Best for: Heavy 140 lb (300 gsm) to 300 lb (640 gsm) cotton paper that light cannot penetrate.
– Tools: Printed line art, wax-free graphite transfer paper (e.g., Saral or homemade pencil backing), masking tape, dry ballpoint pen or stylus.
– Steps:
1. Print your line art at 100% scale to match your canvas or paper size.
2. Position your watercolor paper on a flat drawing board.
3. Place the graphite transfer sheet face-down over the watercolor paper.
4. Tape the printed line art over the transfer sheet.
5. Trace over the lines using a red ballpoint pen or rounded embossing stylus. The red ink helps you see exactly which lines you have already pressed.
6. The pressure transfers a clean, thin graphite line onto the paper underneath.
⚠️ Caution: Always use wax-free graphite paper designed specifically for artists. Cheap office carbon paper contains oily wax that repels water, causing watercolor paint to bead up and skip!
Method 3: The “Ghost Outline” Watercolor Pencil Method
– Best for: Luminous botanical studies and loose florals where you do not want any gray pencil lines visible in the final painting.
– Tools: Printed line art, light yellow or raw sienna watercolor pencil, tracing paper.
– Steps:
1. Flip your printed line art face-down on a light box.
2. On the backside of the paper, trace directly along the black lines using a pale ochre or gray watersoluble pencil.
3. Flip the paper face-up onto your watercolor sheet and burnish the top with a spoon.
4. When you later apply wet watercolor over these lines, the watersoluble pigment dissolves seamlessly into your paint washes, leaving zero graphite residue behind.
5. Dialing In the Converter Settings: Step-by-Step
When you use Pintado’s Photo to Coloring Page Converter, you will see several interactive sliders. Here is how to calibrate them for different art styles:
[Slider 1: Line Thickness]  ──► Low (1-2px) for fine botanicals; High (4-6px) for children's coloring
[Slider 2: Noise Filter]    ──► Turn UP to eliminate photographic film grain and freckle clutter
[Slider 3: Paper Cleanliness] ──► Push rightward to force light gray shadows into pure white
Setup for Portrait Tracing:
– Line Thickness: Set to Medium-Fine (2px). You want eyelashes and iris contours to stay crisp without thickening into heavy black blocks.
– Paper Cleanliness: High (80%). This wipes away subtle facial shading so only eyes, nose plane boundaries, lips, and hairline remain.
Setup for Landscapes & Architecture:
– Line Thickness: Set to 3px. This provides clear definition for distant rooflines, mountain ridges, and stone masonry.
– Invert Mode: Toggle off (Black on White for printing; White on Black if tracing over a dark digital tablet canvas).
6. How to Lighten Graphite Before Applying Wet Washes
Even a feather-light pencil outline can look too harsh once transparent watercolor pigments settle into the paper grain.
Before painting your first wash, use a kneaded eraser (putty eraser):
1. Flatten your kneaded eraser into a soft cylinder or small ball.
2. Roll it gently across your transferred sketch lines. Do not scrub or rub, which will damage the cotton paper sizing.
3. The tacky surface of the kneaded rubber lifts excess graphite flakes, turning dark gray lines into a delicate “ghost outline” that is just visible enough to guide your brush without showing through translucent watercolors.
Frequently Asked Questions (FAQ)
Can I print directly onto watercolor paper with my desktop inkjet printer?
Yes, with caveats! Many modern inkjet printers can feed 140 lb (300 gsm) cold-press watercolor sheets through a rear flat-feed manual tray. However, standard printer inks are water-soluble dyes. If you paint wet watercolor over regular inkjet prints, the black ink will bleed into your colors! To print directly, your printer must use pigment-based inks (like Epson UltraChrome or Canon Lucia PRO), which dry waterproof. For dye-based printers, using graphite transfer paper is far safer.
Can I use these coloring pages for commercial coloring books?
Yes! Any coloring page generated from a photo that you own (or have licensed) is 100% your intellectual property. Pintado operates client-side and retains zero claims, copyright, or data over the images you process.
Why does my converted coloring page have lots of tiny black specks?
Those specks are photographic digital noise, high-ISO sensor grain, or texture from clothing. Simply slide the Noise Suppression / Cleanliness slider upward in the Pintado tool. The algorithm will blur out low-frequency noise while preserving high-contrast edge silhouettes.
Conclusion: Stop Dreading the Drawing Phase
You do not need to spend ten years studying sight-size academic drawing just to enjoy the joyful, flowing magic of watercolor painting. By converting your favorite photo references into clean coloring outlines, you bridge the gap between inspiration and execution.
Head over to Pintado’s Free Photo to Coloring Page Converter, upload your next reference photo, print your custom contour outline, and enjoy a relaxing, confident painting session today.